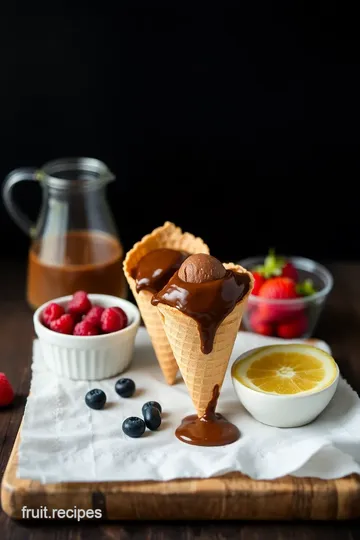
Decadent Melted Chocolate Fruit Ice Cream Cones
Discover how to make Decadent Melted Chocolate Fruit Ice Cream Cones! This easy summer dessert combines creamy ice cream and fresh fruit with irresistible chocolate.

- A Sweet Summer Escape
- look into Into This Decadent Delight
- Why You’ll Love Them
- What You’ll Need
- Essential Ingredients Guide: Your Go-To for Melted Chocolate Fruit Ice Cream Cones!
- Mastering the Art of Professional Cooking: Your Go-To Guide
- Pro Tips & Secrets for Melted Chocolate Fruit Ice Cream Cones
- Perfect Presentation
- Storage & Make-Ahead
- Creative Variations
- Complete Nutrition Guide
- Frequently Asked Questions
- Recipe Card
A Sweet Summer Escape
Oh my gosh, i have to tell you about the summer i discovered melted chocolate fruit ice cream cones . picture this: it was a hot july afternoon, and i decided to host a little backyard gathering.
We had a grill going, and kids were running around like little tornadoes. just when i thought i had everything under control, a friend popped over with a bag of ripe summer fruits.
That’s when i thought, “why not whip up something fun and sweet?” and let me tell you, these cones were a hit! they’re perfect for sunny days, family gatherings, or when you just need a bite of something indulgent.
look into Into This Decadent Delight
So, let’s get into it! the history of ice cream cones goes back to the early 1900s. they were like the original grab-and-go treat.
Fast forward to today, and we’ve come a long way! nowadays, you’ll find all kinds of ice cream—fancy flavors, dairy-free options, you name it.
And blending it with fruity ice cream toppings ? pure genius.
Melted chocolate fruit ice cream cones are easy-peasy. you’ll need about 15 minutes of hands-on time and some chill time while the chocolate sets.
And the best part? there’s no baking involved ! seriously, if you can microwave chocolate and scoop ice cream, you’ve got this.
Let's talk costs: this recipe is super budget-friendly! you can snag everything you need for around $10, which makes it a great choice for serving guests without breaking the bank.
Plus, it yields four generous servings , so everyone gets their fair share of these indulgent frozen treats !
Why You’ll Love Them
Alright, let’s break down why these cones are the bomb. first off, they’re not just a party pleaser—they’re also a great choice for those sweltering summer days.
Light, refreshing, and oh-so-sweet, they allow you to blend fresh fruit desserts with creamy goodness. and can we talk about the health benefits? fruits are packed with vitamins, and when you pair them with a homemade chocolate coating , you get a delightful mix of flavor and nutrition.
Plus, they’re totally customizable! use your fave fruits—strawberries, bananas, or even tropical fruits like pineapple for a tropical fruit dessert vibe.
You can even experiment with different cream flavors . want to go lighter? go for yogurt instead of ice cream.
Another bonus? they’re kid-friendly! little ones love dipping fruits and assembling their own cones. it's like a tasty craft project they can eat! if you’re planning a barbecue, a birthday, or just want to treat yourself, these fun food for gatherings are the way to go.
What You’ll Need
Ready to create these magical cones? Here’s what you’ll need:
- Semi-sweet chocolate for that delicious chocolate coating.
- Coconut oil (or any neutral oil you have on hand) to help that chocolate melt beautifully.
- Fresh fruits—think juicy strawberries, bananas, and pineapple for the ultimate flavor combo.
- And, of course, your trusty waffle cones to hold all that goodness together!
Before you dive into the fun part of making these treats, let's gather our ingredients. trust me, you and your guests are going to love every bite of these no-bake ice cream treats .
Let’s roll up our sleeves and get ready to create a memory that will keep your summer sweet for years to come!
Essential Ingredients Guide: Your Go-To for Melted Chocolate Fruit Ice Cream Cones!
You know those hot summer days when you've got to have something sweet? well, look no further! we’re diving into the world of melted chocolate fruit ice cream cones .
Let’s break it down like your favorite saturday morning cartoon so we can create the ultimate treat together!
Premium Core Components
First up, we need to gather our premium core components . This is where the magic happens!
-
Measurements : for your chocolate coating, we need 4 oz (or 113g ) of semi-sweet chocolate and 1 tablespoon (about 15ml ) of coconut oil.
For the fruity goodness, grab 1 cup (or 150g ) each of strawberries, bananas, and pineapple. and don’t forget your waffle cones !
-
Quality Indicators : Look for chocolate that’s shiny and smooth with a rich cocoa aroma. For fruit, check for firm texture and vibrant color.
-
Storage guidelines : chocolate should stay in a cool, dry spot away from light. it lasts up to a year if stored right! fruit? well, it’s best eaten fresh, but if you can’t, keep it sealed in the fridge.
-
Freshness Tips : Always give the fruits a good sniff! A sweet smell means they’re perfectly ripe. If they’re a little squishy, they might not be the best pick!
Signature Seasoning Blend
Now, let’s take a quick sidestep and talk about enhancing flavors with signature seasoning blends . I mean, who doesn’t love a little kick of spice , right?
-
Essential spices : for these cones, we’re keeping it simple. the chocolate and fruit are the stars, but feel free to toss in a pinch of sea salt on the chocolate for that extra zing.
-
Herb Selections : A sprinkle of mint leaves can totally elevate those fruity flavors, adding a fresh twist.
-
Regional Variations : Depending on where you are, try different fruits! Mango, kiwi, or even peaches can work fabulously in this recipe.
Smart Substitutions
Sometimes you gotta think on your feet with smart substitutions . We don’t always have the exact things in our kitchen, and that’s okay!
-
Common Alternatives : Don’t have coconut oil? Use regular vegetable oil instead!
-
Dietary Modifications : Need a dairy-free option? Go for a dairy-free ice cream that suits your dietary needs!
-
Emergency Replacements : Out of chocolate? Melt some peanut butter and drizzle that on for a totally different but yummy treat.
Kitchen Equipment Essentials
Finally, let’s talk about the must-have tools for our quest to make these Melted Chocolate Fruit Ice Cream Cones pop!
-
Must-Have Tools : All you really need is a microwave-safe bowl or pot for melting, a baking tray, and a spatula or spoon. Keep it minimalist!
-
Preparation Tips : Set up a little assembly line. Have your fruit ready, the chocolate melted, and cones waiting for assembly to make this process super smooth.
-
Storage Solutions : Keep your beloved cones upright in a container while waiting to be filled. This helps them stay crispy and prevents spills!
This recipe is not just about food; it’s about memories! Picture a sun-soaked backyard filled with laughter and kids running around, chocolate-dripped smiles everywhere. It’s simple, fun, and great for gatherings!
So now that we've got all these essentials down, it’s time to whip up those Melted Chocolate Fruit Ice Cream Cones ! Grab your ingredients, and let’s dive into the instructions that’ll have everyone begging for seconds!
Mastering the Art of Professional Cooking: Your Go-To Guide
Cooking might sound like a simple task, but let’s dive into the professional cooking methods that can take your culinary skills to the next level.
Whether you’re whipping up a decadent melted chocolate fruit ice cream cone for a summer treat or planning a dinner for the family, getting the basics down can make all the difference.
Essential Preparation Steps
First things first! we gotta get that mise en place right. you’ve probably heard this fancy french term, and it basically means “everything in its place.
” this means chop your fruits, measure your ingredients, and set them all out before you start. you will thank yourself later.
Trust me on this, organized chaos ain't the way to go!
Now, let’s talk about time management . cooking is like a dance—you gotta keep the rhythm! if you're making those ice cream cones with fresh fruit and chocolate, ensure you've got your chocolate melting while you're chopping fruit.
This way, everything flows smoothly, and you can avoid that last-minute scramble.
Organization strategies are key too. keep your work area clean and clear. get rid of anything you’re not using. safety considerations? never forget to wash your hands, especially after handling raw food.
Keep that space as fresh and clean as the toppings you're about to whip up!
Step-by-Step Process
Alright, let’s break it down. For our Melted Chocolate Fruit Ice Cream Cones , follow these steps:
-
Melt chocolate: Start with 4 oz of semi-sweet chocolate in a microwave-safe bowl. Get it nice and melty in 30-second bursts , stirring in between until it's smooth.
-
Prepare a tray: While that's melting, get your baking tray ready. Line it with parchment paper—this will keep your goodies from sticking.
-
Dip and chill: dip each piece of fruit in that chocolate goodness and place them on the tray. after coating, pop the tray into the fridge for about 30 minutes .
This way, the chocolate sets perfectly!
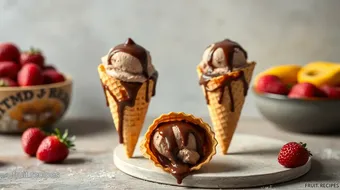
-
Scoops Galore: Grab those waffle cones, scoop in some ice cream, and top with your chilled, chocolate-covered fruit.
-
Serve it up: Drizzle any leftover melted chocolate on top. Oh, the temptation! Serve immediately.
Expert Techniques
Now, let’s sprinkle in a few expert techniques . always check your chocolate’s temperature; if you heat it too high, it can seize up.
A good rule of thumb is to keep it below 120° f . and don’t rush; patience is key, especially in learning those chocolate melting techniques .
When dipping your fruits, make sure they’re fully coated—otherwise, what’s the point? before calling it a masterpiece, do a quick visual check: the chocolate should have a shiny coating and a nice snap when set.
If it’s dull and crumbly, you might need to rework it.
Success Strategies
A great dish is about avoiding common mistakes. don’t dunk warm fruit into melted chocolate; it won’t set properly! also, you want to make sure the chocolate is fully set before assembling.
Trust me , a melting mess isn’t cute.
Thinking about quality assurance? Always taste as you go. This ensures you’re on the right track to those indulgent frozen treats everyone raves about.
For those looking to prep ahead, the good news is these cones are perfect for make-ahead options . you can dip the fruit a day before and store it in the fridge.
Let your friends and family build their own cones when you have your gathering, just like a fun diy dessert station!
Additional Information
Whether you're keen on creating a tropical twist or keeping it classic, remember that these ice cream cones are fully customizable! you can add different fun toppings or even switch up the flavors of ice cream.
Next time someone asks for an easy dessert idea , you can confidently pull out this decadent recipe and impress them.
In a nutshell, elevating your cooking skills involves a blend of organization, precision, and a sprinkle of creativity. So grab your ingredients, and let's get cooking! Your next family gathering or summer party will be a hit with Melted Chocolate Fruit Ice Cream Cones as the star!

Pro Tips & Secrets for Melted Chocolate Fruit Ice Cream Cones
Alright, let’s dive into the good stuff! making melted chocolate fruit ice cream cones is already a fantastic idea, but here's how to take them up a notch.
Pro tip #1: use good quality chocolate. i’m talking about that rich, dark chocolate that melts smoothly and tastes like heaven.
Honestly, it makes all the difference, trust me!
Now, if you're pressed for time—who isn't these days, right?—try melting the chocolate in a microwave-safe bowl in 30-second bursts .
Stir between each round. boom! you’ve got melted chocolate without the fuss. that's a big-time-saving technique, no joke. and don’t forget, chilling that chocolate-coated fruit is crucial.
It sets up nice and firm, so you can avoid that runaway chocolate mess when they hit the ice cream.
For flavor enhancement, consider sprinkling a little sea salt on the chocolate before it sets. the balance of sweet and salty will have your taste buds dancing! presentation matters too; use colorful, fresh fruit.
It’ll not only taste amazing, but it’ll also look super inviting.
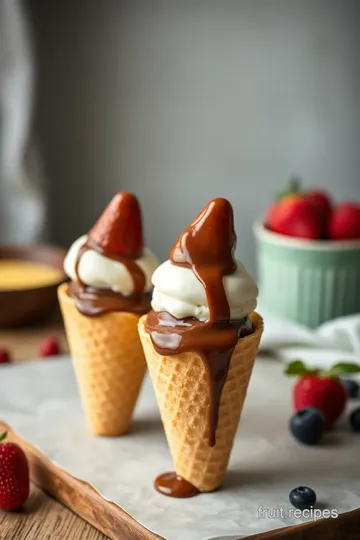
Perfect Presentation
When it comes to plating, you want your melted chocolate fruit ice cream cones to basically scream “eat me!” so, first off, don’t overload them with fruit.
A scoop of ice cream followed by a few pieces of that fabulous chocolate-dipped fruit makes for a great balance.
For garnish ideas , fresh mint leaves are a winner. they add a pop of color and freshness that’s just unbeatable.
You can even drizzle some leftover chocolate over the top for that rich, gourmet look. now that’s what i call a fancy ice cream cone!
And hey, think color combinations! use bright berries—strawberries and blueberries—or citrusy fruits like oranges to make your cones visually appealing.
A beautiful dessert isn’t just about taste; it’s about that eye candy that gets people excited!
Storage & Make-Ahead
Okay, so what if you want to whip these up ahead of time? you’re in luck! those chocolate-dipped fruits can hang out in the fridge for a couple of days—just make sure they’re in an airtight container.
If you’re going longer than that, freeze ‘em! they’ll keep for about a month.
When you’re ready to eat, grab those cones filled with ice cream from your freezer. just let them sit for about 5- 10 minutes to soften up a bit before diving in.
For optimum freshness, i recommend serving your melted chocolate fruit ice cream cones immediately after assembly. there’s nothing worse than soggy cones, am i right?
Creative Variations
Let’s talk creativity! you can totally adapt this recipe. if you want to play around with flavors, try using different fruits based on the season.
Summer’s perfect for juicy peaches, while fall calls for apples. yum! you could make tropical fruit dessert cones with mango and coconut ice cream.
And if you’re looking to accommodate dietary needs, swap out the regular ice cream for a dairy-free alternative . coconut ice cream pairs perfectly with the chocolate and adds a creamy texture that’s to die for.
Feeling adventurous? Use yogurt instead of ice cream for a lighter, healthier treat! It’s all about customizing your dessert to fit your vibe.
Complete Nutrition Guide
Now, let’s break it down nutritionally. each of these melted chocolate fruit ice cream cones contains roughly 300 calories , which isn’t too shabby for an indulgent frozen treat.
They offer a nice little mix of vitamins from fresh fruits and some good fats from the chocolate.
But hey, always consider your portion. one cone is typically a good serving size for most folks. if you’re sharing with the family, perhaps make a cone-smorgasbord and lay out the toppings for a fun diy dessert night.
You know i’m a sucker for family-friendly recipes that bring everyone together!
So there you have it! melted chocolate fruit ice cream cones are not just a dessert; they’re an experience. they’re easy to whip up, customizable, and totally drool-worthy.
Whether you're chilling on a hot summer day or throwing a small gathering, these cones are sure to impress. go on and get your hands chocolatey; your friends and family will thank you for it later!
Frequently Asked Questions
What are Melted Chocolate Fruit Ice Cream Cones?
Melted Chocolate Fruit Ice Cream Cones are a delicious dessert that features fresh fruit coated in melted chocolate, served on top of creamy ice cream in a crispy waffle cone. They are perfect for hot summer days, combining the rich flavors of chocolate and the freshness of fruit for a delightful treat.
How can I make Melted Chocolate Fruit Ice Cream Cones healthier?
To make these ice cream cones healthier, consider using a low-calorie or dairy-free ice cream alternative, and opt for dark chocolate instead of semi-sweet chocolate for added antioxidants. You can also increase the fruit content by adding more fresh fruit or substituting with yogurt for a lighter option.
Can I prepare the chocolate-covered fruit in advance?
Yes, you can prepare the chocolate-covered fruit ahead of time! Simply coat the fruit and chill them in the refrigerator until the chocolate has set. They can generally be stored in an airtight container for up to 2 days before assembling your Melted Chocolate Fruit Ice Cream Cones.
What different fruits can I use for my ice cream cones?
You can use a variety of fruits for your Melted Chocolate Fruit Ice Cream Cones. Strawberries, bananas, and pineapples work wonderfully, but feel free to experiment with other fruits like raspberries, blueberries, or even apple slices. Just ensure that the fruits you choose can hold up well when dipped in chocolate.
What can I do if the chocolate is too thick when melting?
If your melted chocolate is too thick, you can add a little more coconut oil or a small amount of vegetable oil to thin it out. Stir well to achieve a smoother consistency before dipping your fruit. It’s important to melt the chocolate in short intervals to prevent it from burning or thickening too much.
How should I store leftover Melted Chocolate Fruit Ice Cream Cones?
If you have any leftovers, it's best to keep the components separate for optimal freshness. Store the cones in an airtight container at room temperature, while the chocolate-covered fruit can be kept in the fridge. Avoid storing assembled cones, as the ice cream will melt the cone and make it soggy.
Decadent Melted Chocolate Fruit Ice Cream Cones Card
⚖️ Ingredients:
- 4 oz (113g) semi-sweet chocolate, chopped
- 1 tbsp (15ml) coconut oil
- 1 cup (150g) strawberries, hulled and quartered
- 1 cup (150g) banana, sliced
- 1 cup (150g) pineapple, diced
- 1 cup (240ml) ice cream (vanilla or your choice)
- 4 waffle ice cream cones
🥄 Instructions:
- Step 1: Melt the chocolate and coconut oil together in a microwave-safe bowl in 30-second bursts, stirring in between until smooth. Alternatively, use a double boiler.
- Step 2: Prepare a baking tray lined with parchment paper.
- Step 3: Dip each piece of fruit in the melted chocolate
- Step 4: Transfer the tray to the refrigerator and chill for about 30 minutes, or until the chocolate is set.
- Step 5: Fill the waffle cones with a scoop of ice cream.
- Step 6: Add the chilled chocolate-coated fruit on top of the ice cream.
- Step 7: Enjoy immediately, drizzling any remaining melted chocolate over the cones if desired.
Previous Recipe: Easy & Refreshing Cooked Vermicelli with Fruits & Nuts Delight: A Summer Treat!
Next Recipe: Quick Indian Tricolor Salad: Prepare in Just 15 Minutes!