Fruity Pebbles Cereal Bars
Looking for a fun no-bake recipe? Try these Fruity Pebbles Cereal Bars! They're a colorful, kid-friendly snack, and the fruity pebbles nutrition label is surprisingly delightful.

- Fruity Pebbles Cereal Bars: A Colorful Treat for Every Occasion
- Essential Ingredients Guide for Fruity Pebbles Cereal Bars
- Fruity Pebbles Cereal Bars: A Colorful Treat for Every Occasion
- Pro Tips & Secrets for Fruity Pebbles Cereal Bars
- Perfect Presentation Tips
- Storage & Make-Ahead Tips
- Creative Variations
- Complete Nutrition Guide
- Expert FAQ Solutions
- Recipe Card
Fruity Pebbles Cereal Bars: A Colorful Treat for Every Occasion
Oh my gosh, let me tell you about the time i made these fruity pebbles cereal bars for my niece’s birthday party.
I wanted to create something quick, colorful, and totally kid-friendly. you know how kids can be picky, right? but these bars were like a magical spell! everyone—kids and adults—loved them.
It's just so easy to whip up a no-bake dessert that’s bright and fun. honestly, if you’re looking for a delightful mix of crunch, sweetness, and nostalgia, this fruity snack is a total win!
Recipe Overview
Now, here’s a little background: fruity pebbles cereal has been a staple in american kitchens since the 1970s. madness, right? that vibrant rainbow of colors and fruity goodness has kept us hooked for decades! these delicious cereal bars are quite a modern classic in their own right.
They marry that iconic cereal taste with gooey marshmallows for a treat that’s just lit ! i mean, who doesn’t want a snack that feels like a party in their mouth?
In terms of ease, this recipe is as straightforward as they come. i’d say it’ll only take about 10 minutes to throw everything together and another 30 minutes to chill.
Seriously, less than an hour for sweet, chewy magic! plus, it yields about 12 bars, which is perfect for sharing (or not—no judgment here!).
And the cost? you can put this together on a budget; the ingredients are wallet-friendly.
Key Benefits
Let’s chat about health benefits —well, sort of! While these bars aren't exactly kale, they do have some pros. The Fruity Pebbles nutrition facts show they’re low in protein, but they can energize your little ones with quick carbs and sugars—perfect for school-day snacks or post-game treats! And let’s face it, who doesn’t love homemade cereal bars that look like a rainbow explosion?
I can’t stress enough how great these bars are for parties. picture this: vibrant colors that pop, sweet flavors that dance, and tons of fun! they’re perfect for birthdays, holidays , or even just a rainy day snack when the kids are climbing the walls.
Honestly, if you're looking for something simple yet delicious that appeals to everyone, these are your go-to.
And let’s not forget... fun no-bake recipes are a lifesaver for last-minute gatherings! unlike many dessert bars , these don’t require an oven, which is fantastic when it’s hot outside or you just don’t feel like dealing with the dishes.
Plus, since they are kid-approved, they are sure to be an instant hit with your munchkins.
So, are you ready to create these colorful snacks? before we dive into the ingredient list, just know that they not only check off the “sweet treat for kids” box but also can be adapted! want to make them gluten-free? swap out the cereal for one of those fruity pebbles alternatives .
Craving something richer? toss in some chocolate chips or drizzle some melted chocolate on top for an amazing twist.
Let’s get to the fun stuff—the ingredients that will mix up this happy, vibrant world of Fruity Pebbles goodness!
Essential Ingredients Guide for Fruity Pebbles Cereal Bars
So, you're ready to whip up some fruity pebbles cereal bars , huh? good choice! they're a super easy no-bake dessert that’s perfect for kids and adults alike.
But wait—before we dive into the recipe, let’s chat about the essential ingredients you'll need. trust me, knowing your stuff makes a world of difference when you’re cooking.
Premium Core Components
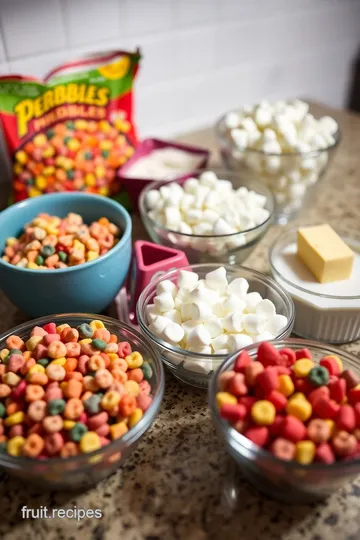
First off, let’s break down those key ingredients . Here’s what you’ll need:
-
6 cups (150g) Fruity Pebbles cereal : This colorful cereal is the star of the show. Look for boxes with vibrant colors and not too many crushed bits—nobody wants sad-looking snacks!
-
4 cups (about 280g) mini marshmallows : Make sure these little fluff balls are fresh and soft. Older marshmallows can turn into hard lumps—yuck!
-
3 tablespoons (42g) unsalted butter : Go for good quality butter; it makes a difference! And for storage, just keep it in the fridge for up to a month.
Freshness tip: Check for that squishy feel in marshmallows and the rich smell in butter when you buy them. You want the good stuff for your colorful snacks !
Signature Seasoning Blend
Now, with a recipe like this, you might be wondering if you need any extra flavors. I can’t stress enough how a little bit of salt can elevate sweet treats!
A pinch of sea salt (about 1/4 teaspoon ) can balance out the sweetness from the marshmallows. if you’re feeling fancy, add a splash of vanilla extract for that warm, home-baked charm.
But don’t go overboard; you want those fruity flavors to shine!
Smart Substitutions
Easy cooking means understanding your options! Here are some common substitutions if you’re in a pinch:
-
Gluten-Free Options : Not all cereals are created equal. If gluten's a concern, consider finding a gluten-free cereal as your base, or pick Fruity Pebbles—this cereal usually checks that box!
-
Nut-Free : For those avoiding nuts, happily, this recipe is naturally nut-free!
-
Dairy-Free : Grab some dairy-free butter and vegan marshmallows for a homemade cereal bars version everyone can enjoy.
-
Emergency replacements : Can’t find mini marshmallows? Just chop up regular ones! It'll still work out great. This is perfect for last-minute snack ideas for kids or festive treats when company’s on the way!
Kitchen Equipment Essentials
Don’t forget your tools! You’ll need:
-
A large mixing bowl : Make sure it’s big enough to hold all those Fruity Pebbles ingredients without spilling over.
-
A 9x13 inch (23x33 cm) baking dish : Lining it with parchment paper is a must for easy clean-up. Plus, it ensures your bars don’t stick too much!
-
Wooden spoon : For mixing; you don’t want to use anything metal here as you’ll be stirring some sticky marshmallow goo.
-
Saucepan : Just small enough to melt everything together without making a mess.
-
Optionally, a little non-stick cooking spray can help when you’re pressing the mixture into the dish.
With all these basic ingredients and tools at your side, you're ready to make the happiest, vibrant cereal treats imaginable!
Whew, okay, now that we’re all set with the essentials, it’s time for the fun stuff—making those delicious bars! Prepare for a kitchen adventure with one of the best quick snack recipes around!
Let's jump into the instructions in the next section and create something sweet and memorable together.
Fruity Pebbles Cereal Bars: A Colorful Treat for Every Occasion
Let’s talk no-bake desserts , shall we? honestly, who doesn’t love something easy, quick, and super colorful? enter the fruity pebbles cereal bars ! with their vibrant colors and sweet taste, these little gems are perfect anytime —be it after-school snacks, birthday parties, or just a cheeky treat for yourself.
Now, let’s dive into the professional cooking method and make this treat shine!
Essential Preparation Steps
Before we get our hands messy, let’s chat about some important prep work. You gotta get your game face on!
Mise en place is key! this fancy term just means getting everything in place beforehand. measure out 6 cups of fruity pebbles , 4 cups of mini marshmallows , and 3 tablespoons of unsalted butter .
Keeping everything ready helps you avoid those last-minute scramble moments—that’s when chaos rules in the kitchen.
Time management is another biggie. you may only need about 10 minutes for prep and 5 minutes for cooking , but factor in the 30 minutes of chilling time .
Plan your other kid’s snacks while this cools down! multi-tasking can be your best buddy here.
Step-by-Step Process
Now, let’s get down to the nitty-gritty, shall we? Here’s how you whip those bars up in style.
-
Prep the baking dish: line a 9x13 inch baking dish with parchment paper. leave a little overhang to lift the bars out later.
For good measure, a spritz of non-stick spray wouldn’t hurt!
-
Melt Butter and Marshmallows: In your saucepan, toss in the butter and marshmallows. Stir over low heat until everything is melted smooth—like really smooth. That’s about 5 minutes , just keep stirring.
-
Combine with Cereal: Off the heat, add the Fruity Pebbles. Here’s the fun part: mix it all together until every piece of cereal is coated in that gooey goodness!
-
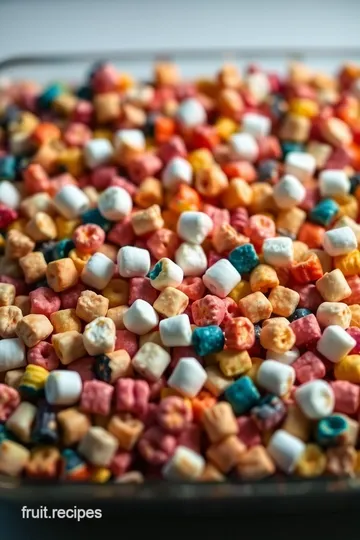
Transfer Mixture: Pour that colorful mixture into your dish. Use your hands or a wooden spoon (damp is best to avoid a sticky situation) to press it down evenly.
-
Chill: Time to chill out! Pop those bars in the fridge for about 30 minutes to set.
-
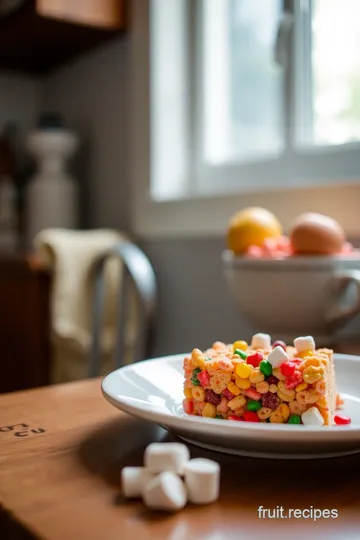
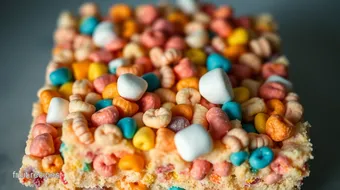
Cut and serve: once set, use the parchment overhang to remove them from the dish. cut into squares—this should yield about 12 bars .
Feel free to shower some extra fruity pebbles on top for pizzazz!
Expert Techniques
You might think this recipe is simple, but there’s a pro approach that elevates your dessert game.
-
Temperature control while melting marshmallows is crucial. Too hot and they’ll burn; too cold, and they won’t melt right. Low heat is your best bet.
-
Timing precision matters too! Use that 30 minutes wisely. Maybe put on a quick show for the kids while you savor some "me time."
-
Don’t forget about quality checkpoints . Make sure your marshmallows are fully melted while stirring. A lumpy mess isn’t what we’re going for here!
Success Strategies
Now, let’s avoid some beginner blunders.
-
Common mistakes ? Not pressing the mixture firm enough! You want a solid base for your bars to hold together.
-
Aim for those quality assurances : if your bars crumble when you cut, they're too loose.
-
Looking to jazz things up? Try adding chocolate chips or mini candies to the mix! Or for those health-conscious folks, check out the Fruity Pebbles nutrition facts for alternative snacking ideas.
Additional Information
Cooking is all about having fun while learning. Want to spice these bars up? Maybe drizzle some chocolate on top or experiment with earthly additions like nuts! And always keep in mind—knowing about the fruity pebbles nutrition label can help with choosing your ingredients wisely!
So there you have it! look into into this easy cereal bars recipe and enjoy a colorful snack that not only tastes great but is also a feast for the eyes.
Happy snacking!
Pro Tips & Secrets for Fruity Pebbles Cereal Bars
Okay, friends! let's talk about how to amp up those fruity pebbles cereal bars to pure perfection. first off, here’s a tip from my kitchen to yours: don’t rush the melting .
I’ve burned marshmallows before, and let me tell ya, it’s a sad moment that ruins the whole vibe. keep your heat low and stir, stir, stir !
Another way to make life easier? prep in advance! if you're short on time, you can melt those marshmallows ahead of time and store them in the fridge.
Trust me, it saves you from the dreaded “where did the time go?” moment. and if you’re feeling adventurous, toss in some mini chocolate chips for an incredible flavor enhancement .
Who doesn’t love that chocolatey crunch in their no-bake dessert ?
As for presenting these beauties, a sprinkle of extra fruity pebbles on top turns them into vibrant sweet treats for kids and even adults! it makes them look fancy without any extra work.
Don't skimp on that visual appeal; your friends and fam will be snapping pics for the 'gram in no time!
Perfect Presentation Tips
Let’s make these treats pop! one of my favorite plating techniques is to stack a few bars for a stunning display.
Drizzle them with melted chocolate for that “wow” factor. if you're super ambitious, you can experiment with color combinations by adding some edible glitter or colorful sprinkles.
Using a fun, colorful plate or a simple white one can really make those bars stand out. you want your delicious creation to feel like a party on a plate.
Just remember to keep it casual – you’re not creating a michelin-star experience, but we’re definitely going for a “why don’t you make these all the time?” vibe!
Storage & Make-Ahead Tips
Wanna know how to keep your bars fresh? First, make sure they’re stored in an airtight container. This keeps them from getting stale and ensures they maintain that delightful chewiness we all love! Generally, they'll stay good for about a week, but I bet you’ll be lucky if they last that long!
Want to prep ahead? you can totally make these easy cereal bars in advance! just whip them up the night before a party and let them chill overnight.
They’ll be ready when your guests arrive, making you the ultimate host. just pop ‘em out and slice. easy peasy!
Creative Variations
Now, let’s get a little creative, shall we? one fun idea is to substitute the fruity pebbles with other cereals like cheerios or even those colorful fruit loops .
You can easily find fruity pebbles alternatives out there that pack just as much flavor! want a nutty twist? throw in some almond butter for a protein punch or mix in dried fruit for a fun twist on classic flavors.
Also, you can cater to dietary needs by making gluten-free dessert options with gluten-free cereal if someone has that restriction.
You could even go vegan by swapping out traditional marshmallows for vegan ones. the options are endless, so let your imagination run wild!
Complete Nutrition Guide
Alright, let’s break it down! a typical slice of these bars packs about 150 calories with just 1g of protein.
I know we love all the fun, but what's that fruity pebbles nutrition label say? most cereals like these offer a decent amount of vitamins and minerals, and the best part about making your own bars is that you can control what goes in.
If you’re watching calories, just remember to stick to portion guidelines. each serving is about one bar, but you can definitely cut smaller squares if you’re feeling generous.
Just think of all the kids snacks you can whip up with these bars. and they’re perfect for a quick snack after school!
Expert FAQ Solutions
You’ve got questions, and i’ve got answers! one of the most common issues i hear is about the bars falling apart.
No stress! just press that mixture down really well when you put it in the pan. also, let them chill fully before you slice.
This gives them a chance to firm up.
If you’re wondering if you can freeze these bars, the answer is a solid yes! just wrap ‘em tightly in plastic wrap and pop them into a freezer bag.
They’ll last for about a month, making them an awesome option for busy times.
At the end of the day, making these fruity pebbles cereal bars is all about having fun and getting a little creative in the kitchen.
Whether you're making them for a party, a snack for kids, or just a sweet treat for yourself, these bars are sure to please.
So go ahead, give them a whirl! and remember, cooking should be a blast, not a chore. so let’s channel our inner kid and enjoy every colorful, crispy bite!
Fruity Pebbles Cereal Bars Card
⚖️ Ingredients:
- 6 cups Fruity Pebbles cereal
- 4 cups mini marshmallows
- 3 tablespoons unsalted butter
- Extra Fruity Pebbles for garnish (optional)
🥄 Instructions:
- Step 1: Line the baking dish with parchment paper, allowing some overhang for easy removal. Optionally, spray with non-stick cooking spray.
- Step 2: In a saucepan over low heat, combine the unsalted butter and mini marshmallows. Stir continuously until fully melted and smooth.
- Step 3: Remove from heat and quickly add the Fruity Pebbles cereal. Stir until the cereal is completely coated with the marshmallow mixture.
- Step 4: Pour the mixture into the prepared baking dish. Use a wooden spoon or your hands (dampened to prevent sticking) to press the mixture evenly into the dish.
- Step 5: Allow the mixture to cool and set in the refrigerator for about 30 minutes.
- Step 6: Once set, lift the bars out using the parchment overhang. Cut into individual squares and serve. Optionally, sprinkle with extra Fruity Pebbles on top for decoration.
Previous Recipe: How to Make Shoney's Strawberry Pie: The Ultimate Summer Treat
Next Recipe: How to Make Jagua Fruit Sorbet: The Ultimate Tropical Treat