Quick Peanut Butter Banana Quesadillas
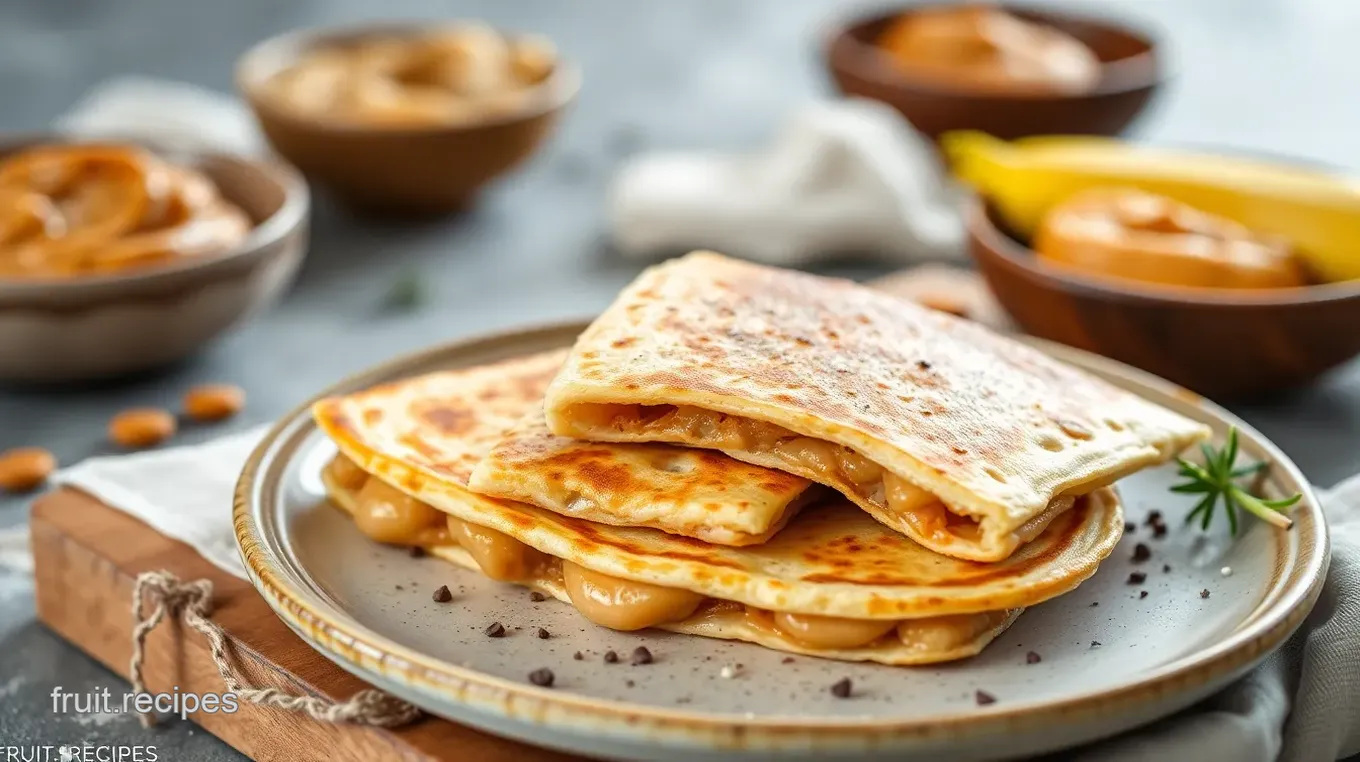
Craving a quick snack? These Quick Peanut Butter Banana Quesadillas combine creamy peanut butter and sweet bananas for a delicious treat. Perfect for all ages!

- A Sweet Journey Begins
- Recipe Overview: A Comforting Treat
- Key Benefits: Fueling Body and Soul
- A Casual Talk on Serving Suggestions
- Essential Ingredients Guide for Quick Eats
- Elevate Your Cooking Game: Professional Cooking Methods
- Pro Tips & Secrets for Quick Peanut Butter Banana Quesadillas
- Perfect Presentation: Make It Pop!
- Storage & Make-Ahead
- Creative Variations: Spice It Up!
- Complete Nutrition Guide: Eating Smart
- Expert FAQ Solutions
- Recipe Card
A Sweet Journey Begins
Oh my gosh, can i just tell you about the time i stumbled upon quick peanut butter banana quesadillas ? it was a lazy saturday morning.
My kids were bouncing off the walls, and i was desperately trying to think of something easy for breakfast that could calm them down.
You know that feeling? it’s like, “please, just a little peace!” a glimmer of inspiration hit me as i noticed a bunch of ripe bananas sitting on the counter, begging to be used.
Quick question: Who doesn’t love the combination of peanut butter and banana? It’s like they were meant to be together! That perfect blend of creamy, sweet goodness in a crispy, warm tortilla? Honestly, I wasn’t just saving the day—I was about to blow my kids’ minds!
Recipe Overview: A Comforting Treat
These quesadillas are a fun twist on traditional comfort food. with a pinch of creativity, you wrap creamy peanut butter and sweet banana in a tortilla.
It’s delicious and easy, which is why they’ve become such a hit in our house!
Historically, quesadillas harken back to mexican cuisine, but let’s face it; we americans have turned them into whatever our hearts desire.
From cheese to barbecued chicken, they’ve evolved into creative quesadilla ideas that go way beyond the original. nowadays, they’ve picked up a modern flair, especially as a go-to for both quick breakfast recipes and after-school snacks.
Plus, you can whip these up in just 15 minutes ! seriously, do you have anything else that easy? the time investment is minimal, and the yield of two quesadillas means no one will go hungry.
Key Benefits: Fueling Body and Soul
Now, let’s chat about the perks! first off, these quesadillas are packed with nutritious snacks for kids . bananas bring potassium to the table, while peanut butter gives you protein.
Plus, if you opt for natural peanut butter, you’re cutting out unnecessary additives. feeling fancy? you can even toss in some chopped nuts or a sprinkle of cinnamon!
They also make for astonishingly healthy comfort food recipes that are tasty enough to serve to guests for brunch or special occasions! picture this: a warm plate of crispy quesadillas set out while friends sip coffee—so welcoming, right? and if you have picky eaters, these quesadillas can be easily modified.
Switch up the nut butter or toss in some chocolate chips for those dessert vibes.
A Casual Talk on Serving Suggestions
What i love about these easy snack ideas is how versatile they are. you could serve them with a side of greek yogurt for extra protein, or even a drizzle of maple syrup if you’re feeling indulgent.
Maybe pair them with some sliced fruit accompaniments for a nice touch.
Ripe bananas scream comfort food, and these quesadillas bring the coziness to any meal. whether it’s breakfast, a quick lunch, or a sweet afternoon snack, they hit the spot without breaking the bank.
Seriously, you can whip up a batch for under ten bucks. and if you're someone who enjoys simple cooking techniques , trust me, these are as straightforward as it gets.
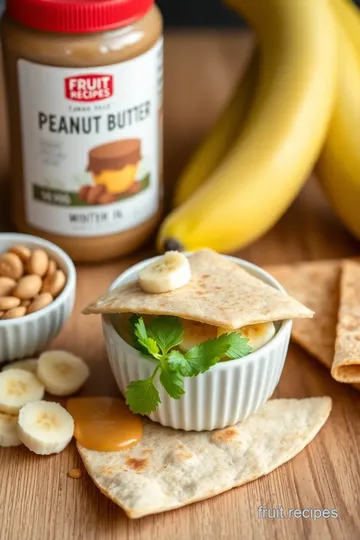
Before jumping into the ingredients, just a little tip: always opt for ripe bananas for a sweeter filling. and hey, if you’re feeling adventurous, mix in some nut butter variations or even try a nut-free alternative like sunflower seed butter.
Your taste buds will thank you!
Now, let's dive into what you'll need to create these yummy bites…

Essential Ingredients Guide for Quick Eats
Let’s talk about the ingredients you’ll always want on hand. i mean, what’s worse than getting excited about a recipe, only to find out you're missing a key ingredient, right? so, let’s break it down, making sure you have everything you need for quick peanut butter banana quesadillas and much more.
Premium Core Components
When it comes to cooking, starting with quality ingredients can make all the difference. for our quesadillas , that means you won't want to skimp on your peanut butter .
I’m talking creamy, not the generic brand that’s half-sugar. detailed measurements ? sure! you’ll need about 1/2 cup (125 g) of your peanut butter for an amazing filling.
Be mindful of freshness—always check for that nutty, rich smell. if it smells off, toss it; you want the good stuff!
Storage guidelines are important too, folks. keep your nut butter in a cool, dry place. once opened, it usually lasts about 3-6 months , but i bet it’ll be gone long before that! freshness tip? stick a spoon in before you buy it; if the oil separates too much or you see weird discoloration, keep looking.
Signature Seasoning Blend
Okay, onto the fun stuff! you know how every good recipe has that special ingredient ? for these quesadillas, that’s a sprinkle of cinnamon .
Just 1/2 teaspoon (2 g) gives it a warmth that complements the sweetness of bananas. speaking of bananas—always go for ripe ones .
The more speckles, the sweeter, so grab those when they're ready!
And if you’re feeling adventurous, get those herbs and spices out! with the rising popularity of sweet and savory options, feel free to mix in things like a pinch of nutmeg or even some chili powder for a wicked twist.
Smart Substitutions
Ever find yourself in the middle of a recipe and realize you’re short on something? fear not! for our quesadillas, you can easily sub out that peanut butter for almond or sunflower seed butter if nut allergies are a concern.
Suddenly, your snack is also a nut-free alternative !
If you’re out of tortillas, don’t sweat it! you can try whole wheat or corn tortillas ; they’ll work just as well.
Honestly, i’ve even used crepes when i was feeling a bit fancy—easy enough for a quick breakfast recipe!
Kitchen Equipment Essentials
Now let’s talk tools. You can’t get far without the basics. Here’s what you’ll need for the quesadillas :
- Non-stick skillet : For that perfect crisp without the sticking drama.
- Spatula : You’ll want something to flip those delicious rounds.
- Knife : For slicing your ripe bananas, so you don’t make a mushy mess.
And if you’re feeling really on top of your game, try using a panini press . It'll save you a ton of time and leave you with perfectly toasted quesadillas every time!
Finally, don’t forget about storage solutions ! Ziplock bags or air-tight containers are your best friends for keeping those tortillas fresh and ready for action.
Wrapping It Up
So there you have it! with the right premium ingredients on hand, some smart substitutions ready to go, and a few essential tools, your cooking game will be on point.
Who knew making quick peanut butter banana quesadillas and other easy snack ideas could be so simple and satisfying?
Let’s dive into the step-by-step instructions! This is where the magic happens. Grab your ingredients and let's make something delicious together!
Elevate Your Cooking Game: Professional Cooking Methods
So, you want to up your kitchen game, huh? well, let’s dive into some professional cooking methods . it sounds fancy, but really, it’s all about preparing, organizing, and executing like a pro—whether you're whipping up something hearty for dinner or a quick snack.
Like, quick peanut butter banana quesadillas ! it's the perfect combo of creamy peanut butter and sweet banana, all melted between warm tortillas—a serious win for breakfast or a late-night craving.
Essential Preparation Steps
Mise en place – it’s just a fancy way to say “everything in its place.” before you even hit that stovetop, you’ll want to gather all your ingredients.
For our quesadillas, that’s the tortillas, peanut butter, bananas, and maybe a drizzle of honey. trust me, messing around in the kitchen is fun, but a little prep goes a long way!
Now, let’s talk time management . before you know it, those quick breakfast recipes can turn into a long ordeal. keep your cook times in mind: prep takes about 10 minutes , and cooking is another 5 .
So, if you’re multitasking, set a timer. it helps to be organized. grab your spatula, and a non-stick skillet, and have those ingredients lined up.
It feels good to keep everything tidy. plus, it’s safer.
And speaking of safety, always remember to handle that skillet with care! If it’s hot, you could easily burn yourself.
Step-by-Step Process
Let's get cooking! Here's your step-by-step guide for these mouthwatering quesadillas.
-
Spread that peanut butter : Use about 2 tablespoons on each tortilla. Go all out, make it nice and even.
-
Add slices of banana on top of two tortillas. Drizzle with honey or maple syrup if you’re feeling fancy. You can also sprinkle a hint of cinnamon for a cozy touch.
-
Top and flip : Cover those babies with the remaining tortillas, peanut butter side down.
-
Heat your pan : Put 1 tablespoon of butter or coconut oil into your skillet over medium heat . Make sure it’s coated well.
-
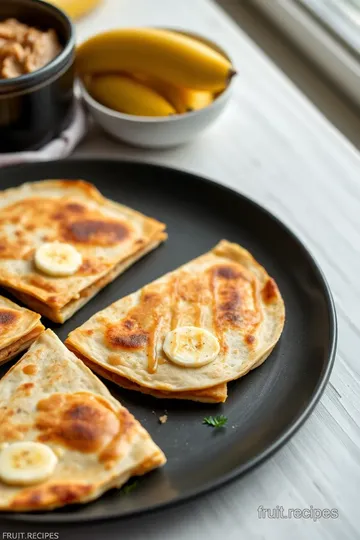
Cook to perfection : place a quesadilla in the skillet and let it sizzle for about 2 minutes until it’s golden brown.
Then flip it, and give it another 1- 2 minutes on the other side until it’s perfectly crispy.
-
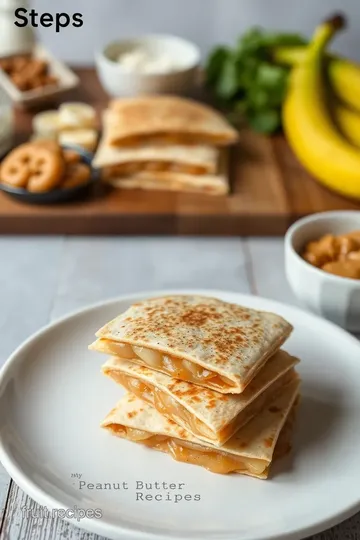
Slice and serve : You’re almost there! Remove from the skillet, slice it into wedges, and voilà!
Expert Techniques
Now, let’s get into a few expert techniques that’ll help you nail this recipe every time. a critical step, in any cooking, is to check your temperature control .
Medium heat is your best friend here—you want a nice toast without burning.
Also, keep an eye on visual cues. when the quesadilla is golden and crisp, it’s ready. if you see any signs of burning, lower that heat a notch! perfect quesadilla technique is all about balancing that crisp and melty filling.
Success Strategies
We’ve all had those “oops” moments in the kitchen. common mistakes? not letting the skillet heat properly or overstuffing those tortillas—less is more! for quality assurance , always taste as you go.
You want a perfect blend of flavors, right?
If you’re prepping for a busy family, make-ahead options are great! You can assemble the quesadillas beforehand, stick them in the fridge, and just cook them up later.
Additional Information
So there you have it! whether it's for a quick after-school snack or a healthy dessert alternative , these quick peanut butter banana quesadillas check all the boxes.
Comfort food snacks don’t have to be complicated! with a little know-how, you can whip up satisfying meals without the fuss!
Happy cooking, my friend! Enjoy diving into more creative breakfast ideas and simple dessert recipes—there’s a whole world of flavor waiting for you in your kitchen!

Pro Tips & Secrets for Quick Peanut Butter Banana Quesadillas
Alright, food lovers! let’s dive into some pro tips and secrets that will elevate your quick peanut butter banana quesadillas game.
Seriously, this dish is as easy as pie—or should i say, quesadilla? here’s what i’ve learned from whipping these up over the years.
Chef’s personal insights: first off, keep it simple. you can swap peanut butter for any nut butter you love. almond, cashew, or even sunflower seed butter, if you’re going nut-free, works great! just spread that creamy goodness on your tortilla like it's nobody's business.
Time-saving techniques: got leftover tortillas? perfect! just grab those and your ripe bananas—no need to run to the store. and if you’re pressed for time, make all the quesadillas at once, slice 'em, and stack 'em up.
Boom! you've got satisfying snacks ready for the whole fam.
Flavor enhancement tips: want to kick it up a notch? drizzle a lil' honey or maple syrup over the bananas before sealing that quesadilla.
Trust me, it just takes it from good to mouthwatering. a sprinkle of cinnamon gives it that cozy vibe too!
Presentation advice: when it comes to serving, don’t skimp on looks! slice the quesadillas into wedges and arrange them on a colorful plate.
Add a few slices of fresh strawberries or apples on the side for that pop of color. we eat with our eyes first, right?
Perfect Presentation: Make It Pop!
Once your Quick Peanut Butter Banana Quesadillas are cooked, presentation is key to making them irresistible.
Plating Techniques:
Use a vibrant plate to contrast with the golden-brown quesadillas. Stack the wedges leaning against each other like a fun little quesadilla tower.
Garnish Ideas:
Top it off with a dollop of Greek yogurt and a dusting of cinnamon or even a few chocolate chips if you’re feeling extra.
Color Combinations:
Pair those golden quesadillas with some bright fruit—reds, greens, yellows. It makes that snack look oh-so-enticing!
Visual Appeal Tips:
Don’t forget to angle your quesadilla slices when plating. It makes a world of difference. Trust me, it’s the small things.
Storage & Make-Ahead
Okay, let’s talk storage, because those Quesadilla Fillings are not just for today!
Storage Guidelines:
If you’ve got leftovers (which I doubt, but just in case), store them in an airtight container in the fridge for about 2-3 days .
Preservation Methods:
Wrap them in foil or plastic wrap before placing them in the fridge to keep them moist.
Reheating Instructions:
To reheat, pop them in a skillet over medium-low heat for about 2- 3 minutes or until warm and crispy again. You’ll be in comfort food heaven!
Freshness Duration:
Best enjoyed fresh, but they can hold up pretty well for a few days. Just don’t let them sit too long, or they could get soggy—nobody wants that.
Creative Variations: Spice It Up!
Feeling adventurous? Let’s explore some creative variations !
Flavor Adaptations:
You could add mini chocolate chips for a chocolate-peanut butter delight! Or even slices of peach if bananas feel played out.
Dietary Modifications:
Want it gluten-free? Use corn tortillas instead. So many awesome tortilla alternatives out there!
Seasonal Twists:
When autumn hits, try adding slices of caramelized apples —hello, fall vibes!
Regional Variations:
How about adding some spicy jalapeños for a savory twist? Classic comfort with a kick!
Complete Nutrition Guide: Eating Smart
Here’s what you might wanna know about this tasty treat!
Detailed Breakdown:
Each serving has about 360 calories packed with 10 grams of protein .
Health Benefits:
Bananas are a great source of potassium, while peanut butter adds healthy fats. It’s a balanced snack choice!
Dietary Considerations:
For those with allergens, the recipe is easily adaptable. You could use nut-free alternatives, and voilà!
Portion Guidance:
Two quesadillas are perfect to share, or keep ‘em for yourself to fuel your busy day.
Expert FAQ Solutions
Now, you might have some questions, right? Let’s tackle those!
Common Questions:
“Can I make these ahead?” Yep, just store them properly!
Troubleshooting Guide:
If the quesadillas stick to the pan, make sure you use enough butter or oil, or crank up the heat!
Success Tips:
Don’t skimp on the peanut butter; it’s the star ingredient!
Variations Explained:
Feel free to mix up the fruit; it’s all about what you love!
In closing, these quick peanut butter banana quesadillas are not just a meal; they’re an experience. from a speedy breakfast to a satisfying after-school snack, they check all the boxes.
So get in the kitchen, grab those ingredients, and whip 'em up. you'll be amazed at what you can create in just 15 minutes! enjoy your flavorful adventure!

Quick Peanut Butter Banana Quesadillas Card

⚖️ Ingredients:
- 4 small flour tortillas (10-inch, or 25 cm)
- 1/2 cup creamy peanut butter
- 2 medium ripe bananas, sliced
- 2 tablespoons honey or maple syrup (optional)
- 1/2 teaspoon ground cinnamon (optional)
- 1 tablespoon unsalted butter or coconut oil, for frying
🥄 Instructions:
- Step 1: Spread 2 tablespoons of peanut butter evenly over one side of each tortilla.
- Step 2: Place banana slices over the peanut butter on two of the tortillas. Drizzle honey/maple syrup and sprinkle cinnamon, if using.
- Step 3: Top the filled tortillas with the remaining tortillas, peanut butter side down.
- Step 4: Melt 1 tablespoon of butter/oil in a non-stick skillet over medium heat.
- Step 5: Carefully place one quesadilla in the skillet and cook for about 2 minutes, or until golden brown.
- Step 6: Flip the quesadilla using a spatula, and cook the other side for another 1-2 minutes until golden.
- Step 7: Remove from skillet, slice into wedges, and serve immediately.
Previous Recipe: Easy Bake Peach Galette with Fresh Summer Flavors: A Cozy Delight
Next Recipe: How to Bake Blueberry Muffins with Crunchy Topping: A Delicious Morning Treat
