Rice Kheer: A Creamy Delightful Indian Dessert
Discover how to Cook Rice Kheer | Creamy Indian Dessert with my easy recipe! Perfect for celebrations, this comforting sweet dish is a must-try.

A Sweet look into Into Rice Kheer
Ever had one of those days when you just need a little pick-me-up? picture this: it's midweek, the weather’s kind of gloomy, and just when i thought comfort food couldn’t get any better, i stumbled upon my mom's traditional kheer recipe .
One stir of that creamy goodness, and i was back to my childhood kitchen, filled with warmth and the aromatic scent of cardamom wafting through the air.
Cook rice kheer | creamy indian dessert - this isn’t just a recipe; it’s a feel-good hug in a bowl!
Kheer has been around for centuries, a staple in indian food culture desserts . growing up, it was served during family gatherings and celebrations.
Today, it remains a popular indian sweet , often making appearances during festivals like diwali or eid. easy to make yet so rewarding, it gets me thinking about just how sharing food connects us all, especially during the holidays.
Diving Into the Recipe
Rice kheer , also known as a creamy rice pudding , takes minimal effort and time. we’re talking about a prep time of just 15 minutes and about 30- 35 minutes on the stove.
You’ll whip up a delicious treat that serves about four people, great for sharing with family or friends. the ingredients? simple but oh-so-rich—only basmati rice , milk , and a sprinkle of sugar, with a bit of cardamom for that sweet, fragrant kick.
But let's talk numbers! this dish is budget-friendly too, especially for a comforting dessert recipe. for under a few dollars, you’ll end up with a luxurious dessert that tastes like you poured your heart and soul into it.
What’s not to love?
Key Benefits of Kheer
Now, why should you make rice kheer ? for starters, it isn't just delicious; it’s also packed with nutrition. you’re getting carbs from the rice, vitamins from the milk, and a scoop of healthy fats from the nuts and raisins in desserts .
Plus, kheer can easily cater to vegetarian dessert options , making this dish a crowd-pleaser across dietary preferences!
Thinking of a special occasion? kheer shines at festivals and parties, a go-to after a spicy meal or as a sweet thoughtful gift.
It truly embodies everything a waming indian dessert is about—comforting, creamy, and endlessly adaptable. want to jazz it up? try coconut kheer variations or even chocolate rice pudding to surprise your guests.
Yes, i’ve been known to mix things up and serve a chocolate twist; who can resist that?
And don’t forget about those homemade kheer tips . a few nuts on top? yes, please! a little saffron for a fancy touch? you're onto something! it’s a festive favorite for a reason, and the best part is, you can take it easy.
Adjust the kheer’s consistency to your liking—trust me, a little more milk works wonders.
Let’s Gather Those Ingredients
Ready to get started? You'll need:
- 1/2 cup of Basmati rice
- 4 cups of whole milk
- 1/2 cup of sugar (yo, feel free to adjust this!)
- A pinch of ground cardamom
- Some salt (it really helps bring out all the flavors)
- Butter if you want that extra richness
- And, of course, chopped nuts and raisins for that crunch.
Don’t worry if your inner chef isn’t feeling it; this is easy kheer preparation . Just keep stirring gently, and before you know it, you'll be ladling out bowls of pure bliss.
So, let’s dive in! Grab those ingredients and keep reading to discover how to whip up your own delightful rice and milk dessert . Trust me, you’ll be thrilled you did!
Essential Ingredients Guide for Homemade Rice Kheer
Let’s start by laying the groundwork for a comforting dessert that you can’t resist— rice kheer ! this creamy rice pudding is popular in many indian households and a must-try in yours.
Think of it as the super star of indian dessert recipes . here’s a quick guide to the essential ingredients you’ll want on hand to whip up this delightful traditional kheer recipe .
Premium Core Components
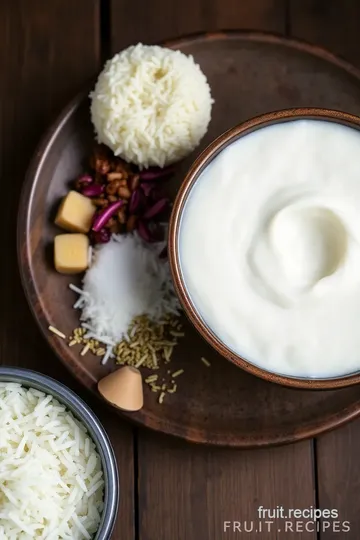
First up, let's get the premium core ingredients sorted out. For Kheer, you’ll need:
- 1/2 cup (100g) Basmati rice – Rinsed, of course; we want that fancy, fluffy texture.
- 4 cups (960 ml) whole milk – Go full-fat here! It’s all about the creaminess, folks.
- 1/2 cup (100g) sugar – Sweetness is key. Adjust based on your taste!
- 1/4 teaspoon ground cardamom – Ahh, the aroma of cardamom; it makes all the difference.
- 1/4 teaspoon salt – Just a pinch to balance the flavors.
- Chopped nuts (almonds or pistachios) and raisins for that finishing touch.
Always look for quality ingredients. fresh basmati rice will elevate your dish. for storage, keep your rice in an airtight container in a cool, dry place—should last a year if sealed right! milk? that’s a bit different.
Always check the expiration date and store it in the fridge. you’ll want the freshest for this delicious rice kheer !
Signature Seasoning Blend
Next, when it comes to spicing things up, think of the signature seasoning blend . Cardamom is your main player, but don’t forget about:
- Cinnamon or a sprinkle of nutmeg if you’re feeling adventurous.
- Then there are the herbs that pair well—fresh mint could give it a unique twist, though it's not the norm for Kheer.
And hey, if you're aiming for a saffron garnished kheer , toss in a few strands for that alluring color and flavor.
Place dried saffron in warm milk for a minute before adding it to your pot—trust me, it’s magic!
Smart Substitutions
We all have those moments—you're missing an ingredient or two. No worries! Here are some smart substitutions :
- If you don’t have Basmati rice, any short-grain rice works well too.
- For sugar alternatives, jaggery is a fabulous option that adds a unique flavor. Just remember it’s a bit sweeter, so adjust accordingly.
Got a vegan friend? Go for coconut milk instead of dairy for a creamy vegan dessert alternative . Or if it’s fruit season, throw in some mango for a fruity Kheer twist that'll blow your taste buds away!
Kitchen Equipment Essentials
Let’s talk tools. You don’t need a fancy kitchen to get started, but a couple of must-have tools include:
- A medium saucepan – The heart of your Kheer-cooking adventure!
- A wooden spoon or spatula – For all that stirring action.
- Measuring cups and spoons, of course! Accuracy is key when cooking.
If you have alternative equipment, like a rice cooker or slow cooker—great! Just keep in mind the cooking times and water-rice ratio.
Wrapping it Up
So, as you can see, making rice kheer isn’t just about following a recipe; it’s about bringing a bit of indian food culture desserts into your kitchen, one delicious spoonful at a time.
This is such a comforting dessert recipe , perfect for holiday desserts in india or any occasion that calls for a little sweetness.
And hey, if you’re curious about the easy kheer preparation , I’ve got you covered with a step-by-step kheer guide coming up next. Let’s get to the fun part—cooking it up!
Mastering the Art of Rice Kheer: A Steamy Affair
If you've ever walked into an indian household during a celebration, you've likely been hit by the sweet, aromatic scent of rice kheer , one of those classic indian dessert recipes that warms the heart.
Let me share some tricks on how to make the creamiest, most delicious rice pudding you can dream of!
Essential Preparation Steps
First up, let’s talk mise en place . this is just fancy french for getting all your ingredients ready before you start.
I promise it makes everything smoother! for our kheer , you’ll want 1/2 cup of basmati rice , 4 cups of whole milk , 1/2 cup of sugar , and a few nuts like almonds or pistachios for some crunch.
Now, here’s a little secret: time management is key here. you can prep your ingredients in about 15 minutes ! while the milk heats, you can enjoy a quick tiktok break—just don’t forget to stir! and don't forget about safety .
Watch those burns! hot milk can have a serious temper.
Step-by-Step Process
-
Prepare the Rice : Rinse that Basmati rice until the water runs clear. This part is crucial to get rid of extra starch. Drain and set aside.
-
Cook the Milk : Heat the 4 cups of milk in a saucepan over medium heat. Stir it often—like, really often—to prevent it from burning. You don’t want that!
-
Add the rice : once the milk starts to bubble (around 8 minutes ), toss in the rinsed rice. lower the heat to a simmer—seriously, it's a low and slow kind of situation.
Keep stirring!
-
The sweet spot : after about 20 minutes of simmering and your kitchen smelling divine, it’s time to add 1/2 cup of sugar , 1/4 teaspoon of cardamom , and a pinch of salt.
Keep cooking until the rice is super soft, which could be around 30- 35 minutes total.
-
Finishing touches : stir in the chopped nuts and optional butter for a touch of richness. if it looks too thick, add a splash of milk.
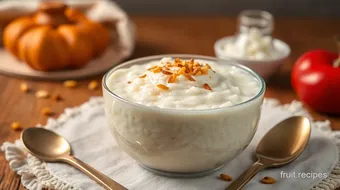
You want that creamy rice pudding vibe!
-
Cool and Serve : Let your kheer cool a bit. It can be served warm or chilled—either way, it’s a match made in dessert heaven.
Expert Techniques
Knowing the critical steps can elevate your kheer game. make sure to stir frequently so you don’t end up with that sad burnt milk at the bottom.
If your kheer is not thickening as you expect, just simmer longer! and always taste as you go . no one likes a kheer that’s too sweet or bland!
For some serious quality checkpoints , i swear by the texture. you want it to be creamy. if you find it too lumpy, quick fix: give it a good stir or use a whisk.
Success Strategies
Avoid common mistakes like skimping on the ingredients. quality rice is a must. and remember, let your kheer cool completely to let it thicken up.
Want to make it a day ahead? trust me, it tastes even better after a night in the fridge.
Check this out : If you’re feeling adventurous, switch it up with your own twist! Try coconut kheer or even chocolate rice pudding . Life’s too short for boring desserts, right?
Final Thoughts!
So there you have it. a step-by-step guide to making the mouth-watering rice kheer or creamy rice pudding that’ll wow your friends and family.
Whether you're celebrating or just indulging your sweet tooth, this traditional kheer recipe is a surefire winner.
Next time you want something cozy and comforting, remember this recipe. you won’t just be serving a dish; you’ll be sharing a piece of indian food culture desserts that brings smiles and warmth.
Don’t forget to explore more about the adaptations of kheer recipes as you level up your dessert game!
Coming up next: We’ll dive into Additional Information that’ll even make this recipe sing! Stay tuned.
Delicious Secrets and Tips for Making Rice Kheer
Oh my gosh, who doesn’t love a creamy rice pudding to top off a meal? when it comes to cooking rice kheer | creamy indian dessert , i’ve discovered some golden nuggets that you must know.
Trust me, they’ll take your kheer from good to absolutely drool-worthy!
Pro Tips & Secrets
Chef's personal insights: so, i learned this the hard way: keep an eye on the milk while it’s boiling. it has a sneaky way of bubbling over and creating a mess.
Use a saucepan with tall sides; it really helps.
Time-Saving Techniques: Want to speed things up? Soak your Basmati rice for just an hour before cooking. This helps it cook faster and absorb that milky goodness.
Flavor enhancement tips: don’t just stick to the basics! toss in some saffron or rose water to elevate the flavors.
You won’t believe the fragrant magic that happens! and trust me—experimenting is fun.
Presentation Advice: When it's time to show off your creation, drizzle a bit of threatened warm milk over the top and sprinkle some chopped nuts for a chic, Instagrammable look.
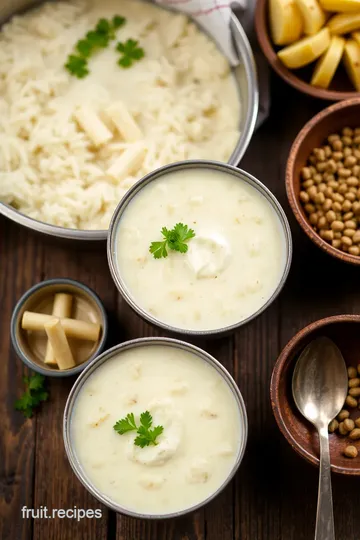
Perfect Presentation
Now that your delicious rice kheer is ready, let’s make it visually swoon-worthy. You want your guests to be wowed before they even take a bite!
Plating techniques: use shallow bowls instead of deep ones. it allows the kheer to spread out nicely, displaying all those nuts and raisins in desserts .
The more surface area, the more toppings you can add!
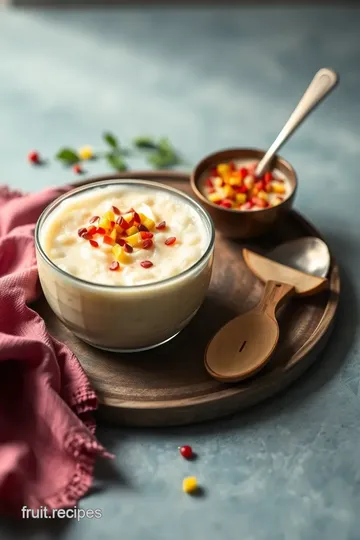
Garnish Ideas: A few saffron strands on top not only add color but also a touch of luxury. And don’t shy away from crispy fried onions; they might sound odd, but they give a surprising twist to sweetness!
Color Combinations: Pair the creamy white of the kheer with the green of pistachios. It’s eye candy and just looks gorgeous on the table!
Visual Appeal Tips: Always serve kheer in clear bowls to show off its rich texture. It’s all about that first impression, you know?
Storage & Make-Ahead
You’ve made this easy kheer masterpiece, but what if you have leftovers?
Storage Guidelines: Store it in an airtight container in the fridge. It'll keep for about 3-4 days . But trust me, it rarely lasts that long in my home!
Preservation Methods: If you're feeling daring, freeze individual portions. Just note it might alter the texture a bit, but still, it’s comforting dessert recipes at its core.
Reheating Instructions: Zap it in the microwave, adding a splash of milk to loosen it up. Stir it well to ensure it warms evenly.
Freshness Duration: For the best taste, aim to consume your Basmati rice dessert within a week!
Creative Variations
Sticking to traditional recipes is great, but don’t be afraid to put your spin on things!
Flavor Adaptations: How about a coconut kheer variation ? Use coconut milk for a tropical vibe. It pairs hilariously well with the warm spices.
Dietary Modifications: If you're looking for vegan options, almond milk does wonders for a creamy vegan dessert alternative . It changes the flavor profile but still keeps it delicious!
Seasonal Twists: Add some chopped apples and a sprinkle of cinnamon for a fall-inspired kheer. Honestly, the sky is the limit!
Regional Variations: In some parts of India, people enjoy kesar kheer where saffron shines. Try adding a little of that next time for a royal touch!
Complete Nutrition Guide
I know, enough about flavor—it’s time to talk about what’s in this luscious treat.
Detailed Breakdown: One serving of this comforting dessert has around 290 calories . But it’s also packed with nutrients. You’ve got healthy fats from nuts, carbs from rice, and a bit of protein too!
Health Benefits: The milk contributes calcium, while nuts and raisins in desserts provide fiber. It’s a surprisingly wholesome treat!
Dietary Considerations: If you're counting calories, adjust the sugar to your taste. You can actually make it lower in sugar without losing that delightful sweetness.
Portion Guidance: A half-cup of this kheer is usually plenty for dessert. Trust me, a little goes a long way!
Time to Get Cooking!
In the end, making rice kheer is about finding comfort in its creamy embrace. each spoonful feels like a warm hug, reminding you of indian food culture desserts enjoyed during festivals and celebrations.
Don’t hesitate to dive in and try this classic dish. you’ll not only join the ranks of those enjoying traditional sweet dishes from india , but also create your magic in the kitchen—one serving at a time.
So go ahead, gather your ingredients, and let the simmering begin!
Frequently Asked Questions
What is Rice Kheer and why is it popular?
Rice Kheer is a traditional Indian dessert made primarily from rice, milk, sugar, and flavored with cardamom and nuts. Its rich and creamy texture, along with its warm, sweet flavors, make it a beloved dish during festivals and celebrations in Indian households.
How do I cook Rice Kheer | Creamy Indian Dessert perfectly every time?
To cook Rice Kheer perfectly, ensure you rinse the Basmati rice well before adding it to boiling milk, which helps achieve a creamy consistency. Stirring frequently during the cooking process prevents sticking and burning, ensuring that the kheer turns out smooth and delicious.
Can I make variations of Rice Kheer?
Absolutely! Rice Kheer can be customized in various ways. You can try Coconut Kheer by substituting whole milk with coconut milk, or even make Chocolate Kheer by adding cocoa powder. Mixing in fruits like mango or banana can also give it a refreshing twist.
How should I store leftover Rice Kheer?
Leftover Rice Kheer can be stored in an airtight container in the refrigerator for up to 3 days. It’s recommended to reheat gently on the stove or microwave, adding a splash of milk if it has thickened too much while cooling.
What are some tips for making the best Rice Kheer?
Choose high-quality Basmati rice for better flavor, and stir frequently to avoid burning. Adjust the sweetness to your taste by adding sugar gradually, and allow the kheer to rest after cooking, as it continues to thicken as it cools. Experiment with toppings like saffron or coconut for added richness!
Is Rice Kheer a healthy dessert option?
While Rice Kheer contains milk and sugar, it's rich in nutrients like protein and calcium. To make it healthier, consider reducing the sugar or using jaggery as a sweetener. Adding nuts increases the nutritional value, providing healthy fats and fiber.
Rice Kheer: A Creamy Delightful Indian Dessert Card
⚖️ Ingredients:
- 1/2 cup (100g) Basmati rice, rinsed
- 4 cups (960 ml) whole milk
- 1/2 cup (100g) sugar (adjust to taste)
- 1/4 teaspoon ground cardamom
- 1/4 teaspoon salt
- 2 tablespoons (30g) unsalted butter (optional, for richness)
- 1/4 cup (35g) chopped nuts (almonds or pistachios)
- 2 tablespoons (about 30g) raisins
🥄 Instructions:
- Step 1: Rinse the Basmati rice under cold water until the water runs clear. Drain and set aside.
- Step 2: In a medium saucepan, bring the whole milk to a gentle boil over medium heat, stirring frequently to prevent sticking.
- Step 3: Add the rinsed rice to the boiling milk. Reduce the heat to low and simmer, stirring occasionally.
- Step 4: After about 15-20 minutes, add sugar, ground cardamom, and salt. Continue to cook until the rice is soft and the mixture thickens (about 30-35 minutes total).
- Step 5: Stir in the chopped nuts, raisins, and optional butter for extra creaminess.
- Step 6: If the kheer is too thick, add a little more milk to reach the desired consistency.
- Step 7: Remove from heat and let it cool slightly. Serve warm or chill in the refrigerator until ready to enjoy.
Previous Recipe: Easy Creamy Dry Fruit Lassi: A Refreshing Twist on the Classic!
Next Recipe: Easy Dip Fruits in Creamy Peanut Butter Delight: A Family Favorite Treat